
Curtain rod return depth over rental blinds: measure how far the blind headrail sticks out, then pick brackets with return/projection 3.5–6 in (9–15 cm) so panels clear the stack, keep landlord blinds in place, skip flush brackets that pin fabric to the headrail, and skip tension rods over blinds that cannot hold that projection. Soft wall honesty (existing holes, No-No or clamp mounts when the lease bans new drywall) protects the deposit. This spoke owns return depth only; hang-high, sheer layering, and slider span stay on their own guides.
Key takeaways
- For calm curtain rod hardware over builder blinds, keep return/projection in the 3.5–6 in (9–15 cm) band so closed panels clear the headrail instead of rubbing it.
- Measure headrail protrusion first. Add fabric stack and ring depth. Then buy brackets that match that outboard need, not the flush number printed on a cheap kit.
- Keep landlord blinds. Cover them. Do not cut, bag, or remove them unless the lease and landlord both say yes in writing.
- Skip flush brackets that leave under about 3 in (8 cm) of clear space in front of the headrail. Skip tension rods over blinds when you need real return depth and a straight span.
- Outside-mount, No-No, or clamp-to-headrail mounts are keep options when the lease limits new drywall holes. Photograph move-in blinds and trim before you hang anything.
- Hang height and width live on hang curtains high and wide. Sheer plus blackout layering lives on layer sheer and blackout over rental blinds. Patio span lives on sliding door curtains rental. This spoke only owns return depth.
- Pair with bounce from make a small room look bigger, dark-room glow from decorate a dark apartment, soft walls from peel and stick wallpaper rental, no-nail calm from hang art rental no nails, plug lamps from rental lighting stack, and TV wall clarity from small living room ideas with TV.
Why does curtain rod return depth matter over rental blinds?
Builder blinds solve day-one privacy and leave a hard headrail that sticks out past the glass. When renters hang a flush rod in front of that rail, fabric snags, rings catch, and the closed stack never looks calm. Return depth (also called projection) is how far the rod sits out from the wall. It is the clearance job, not the height job and not the patio-span job.
A measured curtain rod return depth plan treats the headrail as fixed hardware. You keep what the building installed, measure how far it protrudes, then choose brackets that push the rod 3.5–6 in (9–15 cm) out so panels clear. That band is wide enough for most rental headrails plus rings and a soft fold of fabric, and narrow enough that the rod does not float awkwardly into the room.
AdSense-safe kit only: tape measure, painter tape, brackets rated for the return you need, a rod that matches your window width, rings or hooks, and optional No-No or clamp mounts when the lease bans new drywall holes. Photograph the bare blinds and trim before you hang anything. Do not claim legal advice about your lease; read it and ask the landlord when the wording is unclear.
How do you measure blind headrail protrusion before you buy brackets?
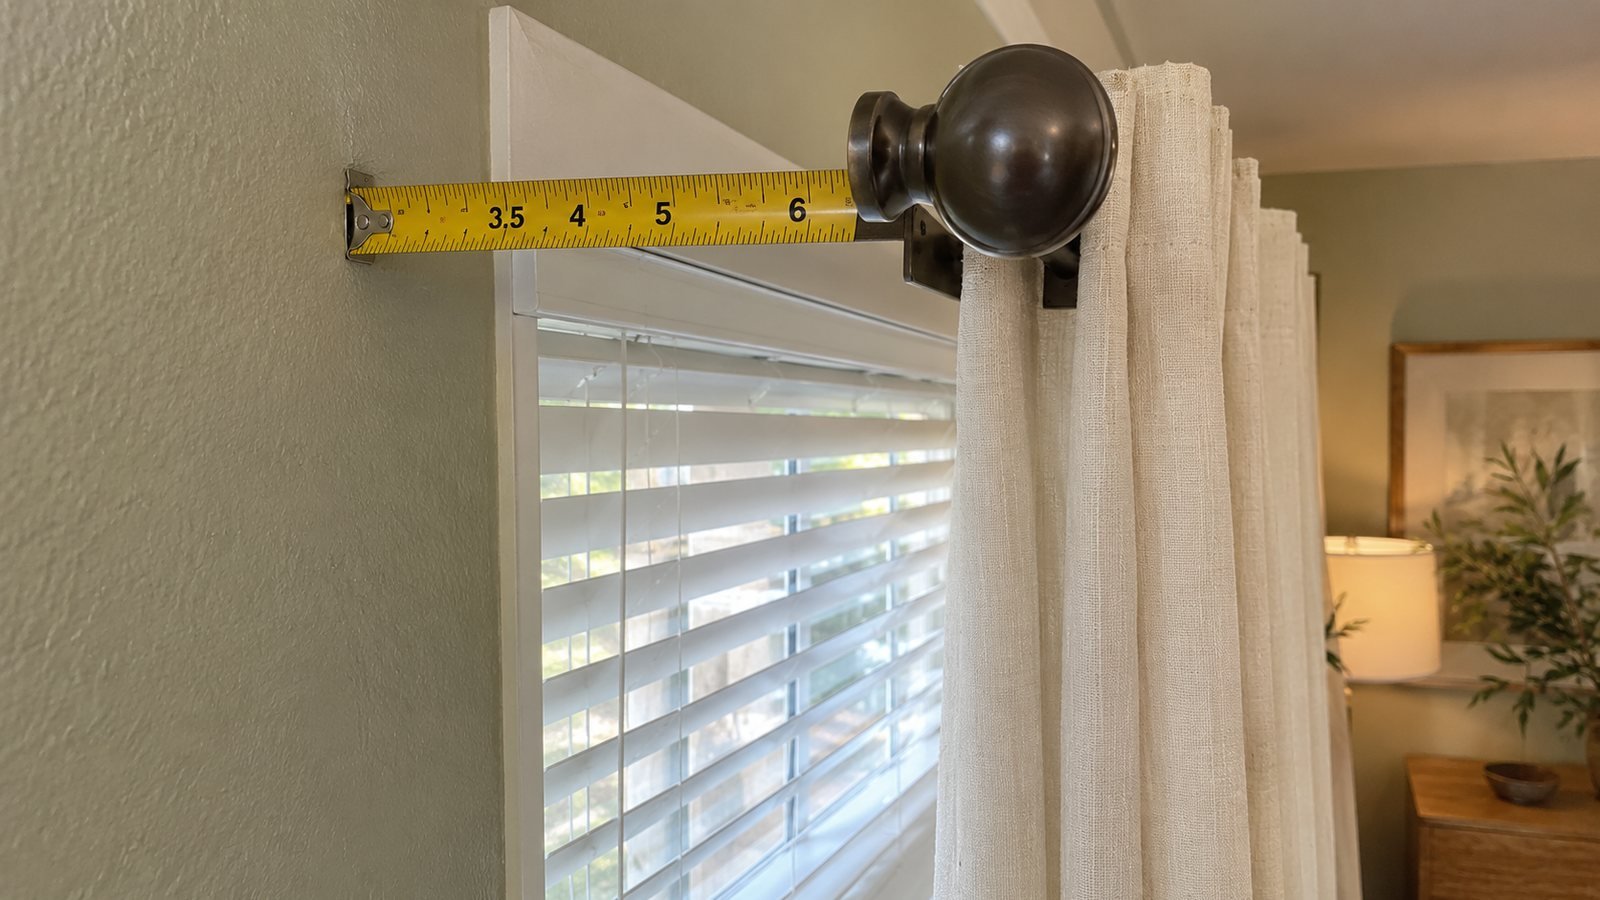
Start at the wall or casing, not at the glass. Place the tape against the finished wall surface beside the window and measure out to the front face of the blind headrail. Typical rental headrails sit about 1.5–3 in (4–8 cm) out, but deep cassette styles and vertical-blind boxes can push farther. Write the number down. Do not guess from a product photo.
Add the extras that eat clearance. Rings or grommets need about 0.5–1 in (1–2.5 cm). Closed fabric needs a soft fold so it does not scrape. A practical buffer is another 1–2 in (2.5–5 cm) beyond the headrail face. If the headrail already sits 2.5 in (6 cm) out and you want 1.5 in (4 cm) of free air plus ring depth, you land near the middle of the 3.5–6 in (9–15 cm) return band.
Painter-tape a temporary outboard mark at 3.5 in (9 cm) and at 6 in (15 cm). Hold a broom handle or spare rod at each mark and soft-test whether a panel sample clears the headrail when closed. Soft sibling honesty: the sheer-and-blackout guide talks about stack depth so layers clear each other; this page is only about how far the rod sits from the wall past the blinds.
When should renters keep brackets at 3.5–6 in (9–15 cm) out?
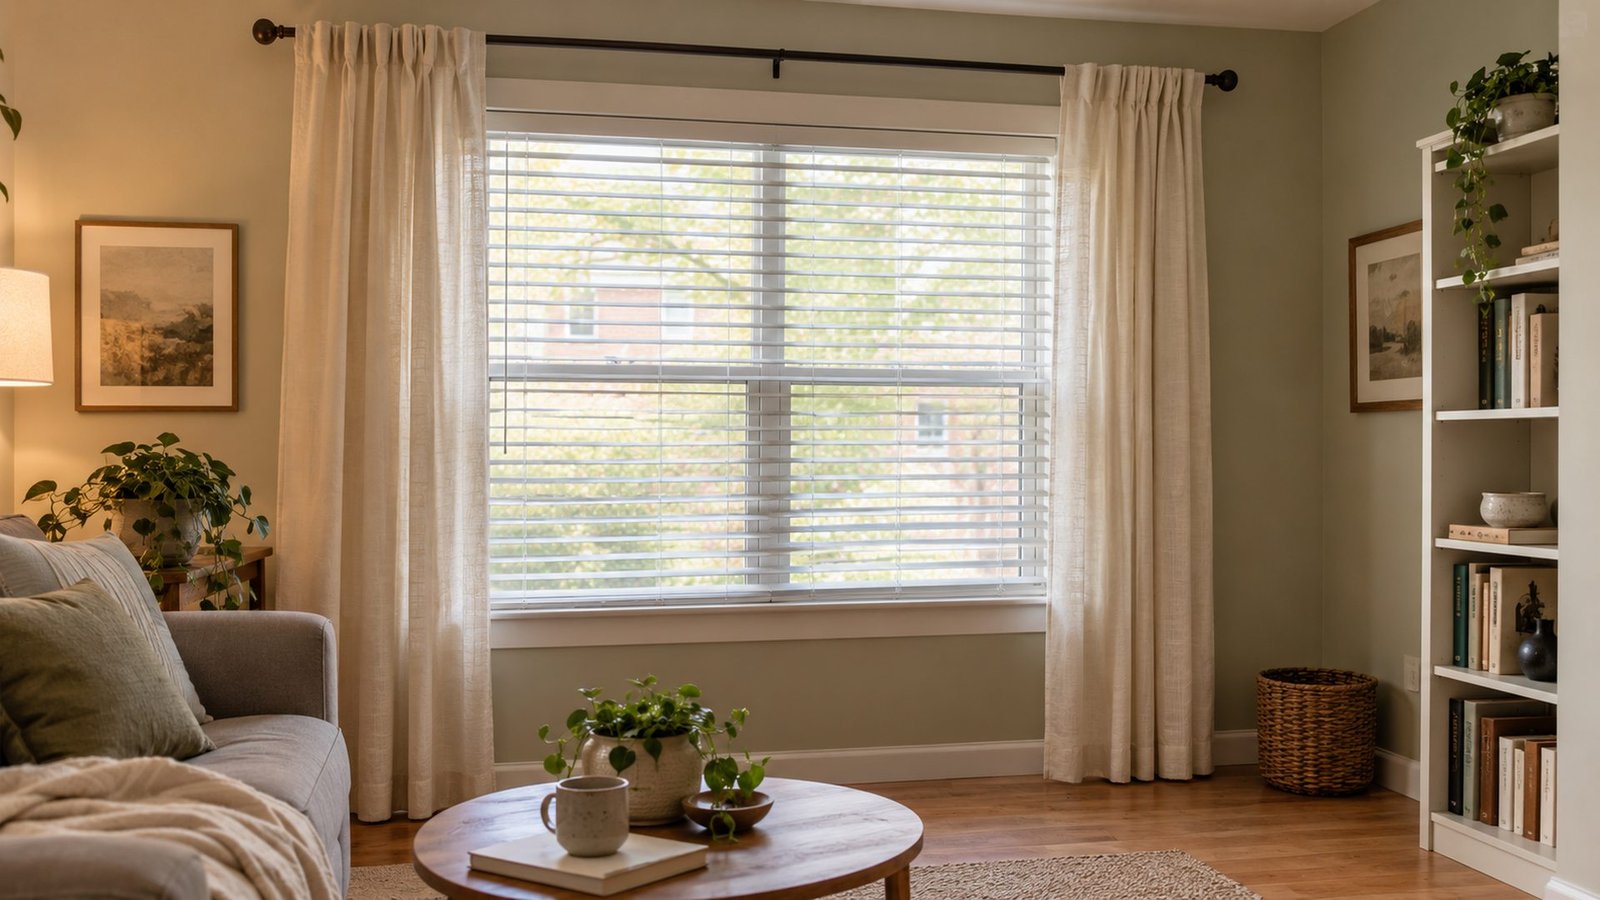
Yes for the outside-mount and over-blinds class this spoke covers. Keep return/projection in the 3.5–6 in (9–15 cm) band when landlord blinds stay in place and you want panels to close without rubbing the headrail. That is the keep recipe for most cream-sage rental windows with wood floors and soft daylight.
Use the lower end (about 3.5–4.5 in / 9–11 cm) when the headrail is shallow and you hang light sheers or a single soft panel. Use the upper end (about 5–6 in / 13–15 cm) when the headrail is deep, you run rings plus blackout weight, or you plan a double rod where the outer rod needs extra air. Do not invent a 10 in (25 cm) floating shelf of rod unless the room truly needs it; over-projection makes the window feel bulky in a small living room.
Work the math with the tape every time. A bracket labeled “standard” on a box may only give 2–2.5 in (5–6 cm) of return. That is flush enough to fail over blinds even when the rod looks fine empty. Buy the measured projection, not the marketing word.
If you already own flush brackets, extension elbows or longer projection brackets are the keep upgrade. Swap the hardware, keep the same rod height when possible, and soft-test again.
When should renters skip flush brackets or a tension rod over blinds?
Skip flush brackets whenever closed panels would sit under about 3 in (8 cm) clear of the headrail face, or whenever rings catch the rail every time you draw the stack. Flush kits are fine on bare trim with no blinds. Over rental blinds they pin fabric to plastic and leave a permanent rub line.
Skip tension rods over blinds when you need real return depth. Spring tension presses into the casing or side walls. It does not create a true outboard projection past a headrail, and it sags once the span and fabric weight grow. Tension can still help a tiny side window with no blinds and a light sheer. It is not the keep tool for a full living-room window that already has landlord blinds.
Also skip adhesive hooks sold for shower curtains, and skip ceiling tension poles meant as room dividers. Neither gives a stable 3.5–6 in (9–15 cm) return over a blind box. Soft honesty beats a weekend of falling rods. If a listing claims “fits any window,” read the return number in inches, not the marketing sentence.
When the lease bans new drywall holes, still skip flush and tension over blinds. Choose No-No clamps on trim or clamp-to-headrail kits that hold a proper rod at the measured projection. Deposit-safe does not mean under-projected.
How do you set curtain rod return depth in one weekend?
Saturday morning: photograph the blinds, headrail, and trim. Measure headrail protrusion from the wall. Painter-tape the 3.5 in (9 cm) and 6 in (15 cm) return marks. Soft-test a panel sample at both marks so you know which end of the band you need. Confirm the window still opens and the blind wand still swings clear of the taped line.
Saturday midday: choose the mount. Prefer existing bracket holes when they already sit high and wide enough. Use No-No or clamp-to-headrail hardware when the lease bans new drywall holes. Install brackets that deliver 3.5–6 in (9–15 cm) of return. Seat the rod so it sits straight and level. If one side of the window has deeper trim, match the visual line even when hole scars differ.
Saturday evening: hang rings and panels. Close the stack and watch for rub on the headrail. If fabric kisses the rail, move toward the deeper end of the band or add extension brackets. Open the blinds and the curtains ten times. Confirm the wand or cord still clears the rod. Load-test blackout weight if that is your outer panel.
Sunday daylight: check morning glare and evening privacy. Soft plug lamps from the rental lighting stack help after dark without hardwiring. If the wall above the sofa needs a quiet frame, keep hanging no-nail on hang art rental no nails. Photograph the finished return for the deposit file.
Light-leak honesty around rods and returns
Return depth helps panels clear blinds. It does not invent blackout. Light still sneaks at the sides of the stack, at the top if the rod sits below the ceiling line, and through pale fabric. Side returns (the short fabric or hardware wrap toward the wall) help edge glow, but they are a different measurement from the outboard projection this page locks.
If you still see a bright strip beside the window at night, widen the rod so stacks park on the wall, not on glass, per the hang-high-and-wide guide. If glare through the glass is the problem, angle the landlord blinds first, then add a denser outer panel. Static film on glass is a separate daylight tool and belongs on its own window-film guide when you need it.
Be honest in photos and in life. A 3.5–6 in (9–15 cm) return stops fabric rub. It will not turn a sheer into a theater curtain. Buy the fabric weight you need, then let measured return do its smaller job. Dark apartments still benefit from soft bounce and lamp layers in decorate a dark apartment rather than pretending projection alone seals the room.
At noon, stand outside the stack and look for a halo at the top corners. If the halo is only at the sides, widen. If the halo is only at the top, raise the rod on the hang-high guide. If fabric is shiny from rubbing the headrail, deepen return first. Diagnose before you buy a second set of panels.
How does this differ from hang-high, sheer, and slider guides?
Hang curtains high and wide owns rod height and stack width so the wall reads taller. Layer sheer and blackout owns inner/outer fabric order and keep-the-blinds layering. Sliding door curtains owns the ~72 in (183 cm) patio span and the skip-tension rule past ~60 in (152 cm). This spoke owns only curtain rod return depth: brackets 3.5–6 in (9–15 cm) out so panels clear landlord blinds.
Do not mash claims. A high rod with flush brackets still fails over a deep headrail. A perfect sheer-blackout order still fails if the outer rod sits too close to the rail. A stout slider rod still fails if return is flush and vanes catch every draw. Keep each measured answer in its lane so Search and AI overviews can cite a clean result.
Room context still matters. Bounce and visual width live in make a small room look bigger. Dark apartments need soft light plans from decorate a dark apartment. Soft wall finishes stay on peel and stick wallpaper rental. TV wall furniture lanes stay on small living room ideas with TV so the curtain stack does not fight a deep media unit.
When you style the same wall as a TV, leave the stack parking zone free of console depth fights. Measured TV stand depth belongs on its own guide; here you only protect return so panels clear blinds without brushing a shallow console edge.
What should you keep, and what should you skip?
| Keep | Skip |
|---|---|
| Return/projection 3.5–6 in (9–15 cm) over landlord blinds | Flush brackets that leave under ~3 in (8 cm) clear of the headrail |
| Landlord blinds left in place and covered | Removing, cutting, or bagging blinds without written OK |
| Measure headrail protrusion + ring/fabric buffer before buying | Guessing return from a box labeled “standard” |
| Outside-mount, No-No, or clamp-to-headrail when holes are limited | Tension rods over blinds when you need real outboard depth |
| Soft-test closed panels for rub before calling install done | Adhesive shower hooks and divider poles as curtain rods |
| Move-in photos of blinds, trim, and finished return | Drilling a forest of new drywall holes when the lease bans them |
| Return depth only; height/width, sheer layers, slider span on sibling guides | Stealing hang-high or slider claims into return-depth math |
| Pair with bigger-room, dark-apartment, peel-stick, hang-art, lighting, TV guides | Fake listicle “10 curtain rod ideas” with no tape measure |
The keep list protects the deposit and the fabric. Vendor pages that push flush kits for “any window” ignore rental headrails. This curtain rod return depth guide optimizes for measured projection, keep-the-blinds honesty, and hardware you can reverse on moving day.
How does this fit with other rental guides?
This spoke is about return depth: brackets 3.5–6 in (9–15 cm) out, measure headrail protrusion, keep landlord blinds, skip flush brackets, skip tension over blinds, and soft-test for rub. High-and-wide placement lives in hang-curtains-high-and-wide-rental. Sheer plus blackout layering lives in layer-sheer-blackout-rental-blinds. Patio span lives in sliding-door-curtains-rental. Bounce lives in make-small-room-look-bigger-renter. Dark-room glow lives in decorate-dark-apartment-renter. Soft walls live in peel-and-stick-wallpaper-rental-small. No-nail art lives in hang-art-rental-no-nails. Plug lamps live in rental-lighting-stack. TV wall clarity lives in small-living-room-ideas-with-tv.
Do not mash claims. Keep return/projection at 3.5–6 in (9–15 cm), keep landlord blinds, skip flush brackets and tension over blinds, and soft-test closed panels so Search and AI overviews can cite a clean answer.
FAQ
What Is a Return Curtain Rod and Do I Need One?
A return is the projection that sets how far the rod sits out from the wall, and sometimes the short wrap of fabric or hardware toward the wall at each end. Over rental blinds you need that outboard depth so panels clear the headrail. For most landlord blinds, keep return/projection in the 3.5–6 in (9–15 cm) band. You need it whenever closed fabric would otherwise rub the blind box.
Why Is Light Still Leaking Around My Curtain Rods?
Return depth stops fabric rub; it does not seal every glow line. Light still sneaks at the sides, at the top if the rod sits low, and through pale cloth. Widen the rod so stacks park on the wall, angle landlord blinds, and choose denser outer fabric when you need more block. Side wrap helps edge glow, but treat it as a separate tweak after the 3.5–6 in (9–15 cm) outboard return is correct.
Can You Hang Curtain Rods in a Rental Without Damaging Walls?
Often yes with deposit-safe mounts. Prefer existing bracket holes when they already sit high and wide enough. Use No-No style brackets or clamp-to-headrail kits when the lease bans new drywall holes. Photograph move-in condition. Skip tension over blinds when you need real return depth. Patch only what your lease allows on exit, and ask the landlord when the wording is unclear.
Should renters keep curtain rod return depth at 3.5–6 in (9–15 cm) over landlord blinds?
Yes. Keep brackets with return/projection in the 3.5–6 in (9–15 cm) band so panels clear the headrail. Measure protrusion first, add ring and fabric buffer, then soft-test a closed panel before you call the install done. Keep the landlord blinds in place unless you have written approval to remove them.
When should renters skip flush brackets or a tension rod over blinds?
Skip flush brackets whenever closed panels would sit under about 3 in (8 cm) clear of the headrail or rings catch the rail on every draw. Skip a tension rod over blinds when you need real outboard return and a straight span under fabric weight. Keep tension for small bare openings with light sheers only. Buy measured projection hardware for living-room windows that still have landlord blinds.
Related: hang curtains high and wide · layer sheer and blackout over rental blinds · sliding door curtains rental · make a small room look bigger · decorate a dark apartment · peel and stick wallpaper rental · hang art rental no nails · rental lighting stack · small living room ideas with TV